In Game
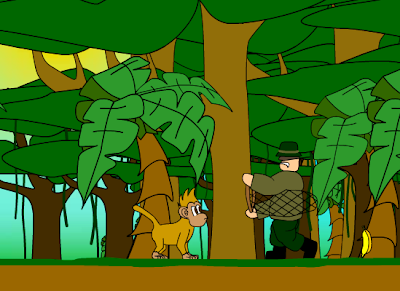 Here's screen-shot of what the game looks like. The monkey needs to avoid getting caught by the evil poacher!
The Monkey Hero
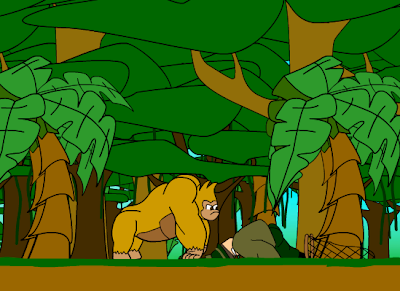
 Here is the "hero shot" of my gorilla character. In the game if the monkey collects enough bananas he will have enough energy to take up his gorilla form and put the hurt back on the poachers.
Mini Monkeys
The Anti-Poacher Concepts
 This was the origional concept drawing for my game. The top drawing was the influence which inspired the walk cycle I eventually created for the gorilla, it is a sketch from a video it came across at http://www.youtube.com/watch?v=_eVp61FasEs
Once Upon a Time
I wanted my character to be expressive with its facial features, which meant I needed to set up a number of different facial expressions which I would be able to morph between. I also wanted it to be cute. In ‘Rockin’ Bones’ I had 2 pretty Bad Ass character, and in ‘Hatching a Fairy’ I had a pretty animation, but cute was something I wanted to attempt, again trying to show a variety in my work.
In searching for some images on the internet I found the perfect precedent for this character: Spyro.

He’s just soooooooo cuuuute!
This cute characteristic was something I wanted to have influence my storyline. Somewhere in my short movie I wanted to create a scene similar to that of the Puss in Boots shot in Shrek 2. I obviously don’t have the skills DreamWorks have but I still wanted to pull something like it off. I noticed the key to that scene was the music that went with it; it was almost like a lullaby.
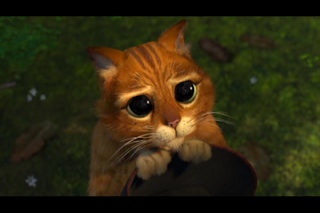 With this now in my head, I was able to start plotting a storyline which went like this:
1. Robert comes home from shopping
2. Robert walks through the door, closes it, and unloads a chicken onto the bench
3. While leaving the chicken unattended, the door can be heard opening – the camera rotates to show an open door with the dragon sneaking in
4. While Robert unpacks the rest of the shopping he hears something (the sound of the dragon munching on the chicken). When Robert returns his attention to the chicken the dragon will be eating it.
5. Robert is shocked to see a dragon eating his chicken and puts it outside
6. The dragon looks up with cute expression at Robert at the door. Robert close door on Dragon
7. A sigh of relief by Robert but when he turn to the chicken, the dragon had magically reappeared inside and eaten the whole thing!
8. Robert, not happy about his stolen dinner, reaches for the frying pan and chases dragon out of the house.
9. The end
The story was clearly going to have a comical feel to it so it needed a comical collection of music to go with it. I decided on a mixture of cartoon style themes which seemed fitting.
How to train [an animator to train] a Dragon?
This project was a struggle right from day one. I really wanted to do something to the same kind of standard as ‘Rockin’ Bones’ but at the same time learn more tools. Coming up with an idea that I was willing to follow through with was my first hurdle to clear. I had 3 main ideas.
1. Use a green room, film a friend in it, then bring him into an animated world (probably my favourite idea).
2. Build an animated character that can talk, and film myself having a conversation with it.
3. Create a scene movie with no talking, but have the facial expressions and movements of myself and an animated character created the mood.
As much as I would have loved to have done option one, I wasn’t able to get access to a green room, or make my own cheap one. Option three was my final decision.
I was again feeling overly ambitious in this project and wanted to build on the skills I developed in ‘Rockin’ Bones’ and make a complex character. I decided to make it more difficult for myself this time by making a dragon. It sounded wonderful at the time, but my skills from the last project were working with 2 legged, 2 armed characters. This time I was working with a 4 legged creature... with wings.
Things I knew I needed to develop on from last time were material and camera movement. With the project brief asking me to blur the barriers between what’s real and what’s animated, camera movement was something that was always going to be a focus area, mainly because, this time, I was going to film physically... in real life... with a real tape... in a real camera...
As for materiality, the problem was overcoming the complex shapes I saw myself as reasonably good at modelling.
This meant I needed to learn more about:
- Bone Movement and Physique – including IK controllers, path, position, and orientation constraints, spring movements, and attaching specified vertices to specified bones (all this just for the wings and eyes!)
- texturing – working with Photoshop to create a unique skin for my dragon, with 4 main materials wings, wing bones, horns, and main body, all with their own gloss and bump maps, while flowing nicely onto each other.
- unwrap UVW – applying the texture to my complex shape (a dragon)
- Camera Tracking – Tracking the camera movements of my filmed footage and using that information to animate the movements of my 3ds Max camera. The most painful process I’ve come across in all my years of study.
- Lighting/reflection/shadows – getting my dragon to look like he’s really there..
All this, in HD... a lot to learn.
The Next Step
When I get some free time I will tweek a few little imperfections and render it again in HD.
As for my next project I want to start looking into other areas which I haven't explored yet and build on what I've already learnt. Eg:
- Grass
- Wind
- Better Biped movement
- More believable materiality
- Post production
- Bringing animations into the real world/the real world into animation
- FIRE
Making a Scene
A couple friends and I came up with a story line for me to work with in my animation. The ideas had to work with the two characters I had created, a fearless/realively mindless skeleton warrior (which I named Bones) and a rock monster with anger management issues (which I named Rocky).
Storyline:
- Introduce Bones - running through a canyon
- Start an earthquake in the canyon while Bones is running
- Bones almost reaches the exit of the canyon but the earthquake causes a landslide which blocks Bones' exit.
- Rocky emerges from the ground behind Bones who now cannot run (not that he would, he is mindless)
- Rocky roars at Bones (just to make it obvious that he's not a particularly happy rock)
- Bones charges at Rocky
- Rocky owns Bones
- The end
This required for me to learn more about a few key tools in 3ds max for this animation, among other things:
- Reactor physics engine
- Biped animation
- Morpher modifier - for facial expressions
- Mental Ray sunlight
- Procutter (I didn't have time to learn enough maxScript to create better fractures)
Making a New Enemy
I eventually gave in and forced myself to come up with a new character. I needed something to be stupid enough to run at this massive monster i created. I decided on a skeleton worrior, a character thats basically fearless, but also mindless, and something that I really enjoy to watch getting its ass get kicked.
 I worked with a similar technique as my first character and attached my imported skeleton structure (from poser 7) to a biped, only this time all the skeletal bones were attached to their coresponding biped bones as rigid bodies, with the exception of the spine and ribs, which I would allow to deform.
I origionally wanted to have a massive battle scene which involved an epic fight scene between the two, a really slow moving but strong rock monster vs a really agile and fearless skelton. However, I only had 5 weeks, not nearly enough time to construct two characters, a dynamic environment, give it all material then animate the introduction of those two characters, apply physics to the environment and after all that, choreograph an epic fight scene... But that would have been awesome!
Building my Monster

The Making of Rockin Bones
My last project (The Fary Beginning), was a really nice, slow, pretty subtle animation. This time I wanted to make something bad ass, fast and epic, just to try and show I can achieve both extremes and give my work some variety. There would be no pretty characters or subtle movements.
I also wanted to challenge myself to learn more about the tools that I used in my first project and build on areas what I needed improve on from my last project, like the lack of variety and quality of materiality. I also wanted to make things more interesting by adding facial features and expressions and generally add the little details which give a character more life.
These were things that I knew I wanted to achieve from day one. But also something I knew would require a stupid amount of commitment to achieve in 5 weeks.
The Fairy End
(very low resolution I have an HD version which I will upload to vimeo later)
Fairy Wings
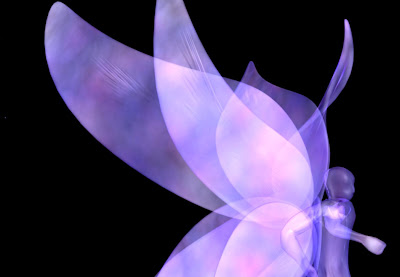 And of course, a fairy is not complete without its wings. When I first created them the wings were static and bland. I wanted to add a wavey movement too it, something to make it seem more natural. Luckily for me there was a wave modifier in 3DS Max which worked perfectly for this job.
Hatching the Egg
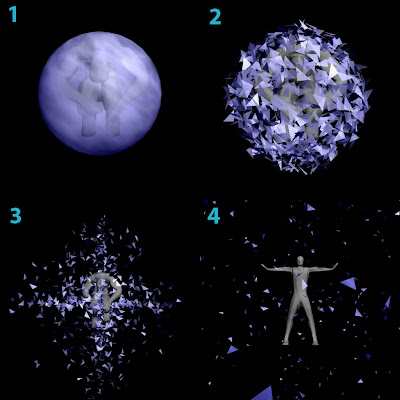
The Fairy and the Biped
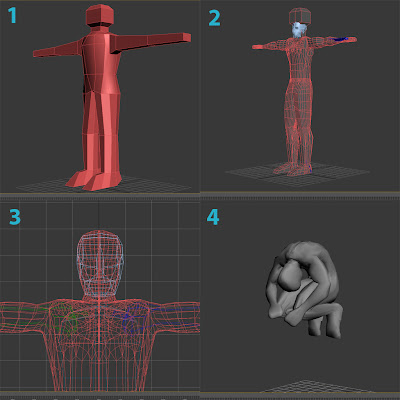 This is where I started working on the animation. I started with buiding a human like mesh (not perfect but good enough to make it clear what it is). I then linked the mesh to a biped (part 3). From there I could start moving the parts of the biped to animate the fairy. This took a very very very long time...
The Fairy Story
This was the basic story that I was hoping to fulfill by the end of the project (only in colour and 3D!).
The Fairy Beginning
I eventually came across a sond in an open-source archive called 'Kiss the Rain' composed by a pianist named Yiruma ( http://www.archive.org/details/Yiruma-KissTheRain ). It was one of those musical pieces that I could listen to multiple times (which I figured was going to happen anyway) and still be impressed by its beauty. I knew I was going to used this piece and have to make a beautiful animation (or as beautiful as possible; this is only my first time animating something) to compliment it.
From there it was deciding what exactly the music made me thing of. A few words came to mind, beauty being one of them, but I needed something tat would direct the story of the animation. I started thinking of things that were beautiful. From amongst the many of other things, the one that I thought would best suit a 30 second video was the idea of growth, the development of something simple into something complex and beautiful. The most obvious example of this to me was a cocoon, where a butterfly hatches and evolves into a butterfly. Although this would look pretty damn good, I can't see myself convincingly digitally animating either of those at this stage, let alone the growth stages in between, but I had the starting point for my story line.
It wasn't hard from there. I remember a project that I had worked on last year where I made fairies in a complicated flash prject where I used the weather conditions to determin their behaviour. So "how about I hatch a fairy?", I thought. And that's how it all began. It gets awful technical from there.


